

Hi everyone, Ranjini here to share my section of the Artist Advent Kit. I was so excited to do this project and was completely stunned to see the finished work of art, and surprised by how beautifully the piece worked in spite of having a number of different contributors – it’s great fun and so inspiring to be in the midst of such talented artists! My section (#9) was quite simple to do:

Materials: (all 7gypsies)
6×6 Lille Paper (abundance)
Affirmations tag (with eiffel tower)
Affirmations “9” tag
Gypsy Hardware (wing)
Paris Tissue

Other Items:
Seam binding ribbon (8″) or string
Glitter
White acrylic paint
Project tips:
– you can substitute the 7gypsies packaging in the kit for any of the chipboard/book board needed. be very careful when opening the packaging if you would like to use it.
– keep ALL your paper scraps from each section, you will need them for section #11
– you can use scissors in place of all punches
– you can use the purple ribbon in the ATC Photo Display kit in place of any string and wire
Instructions:
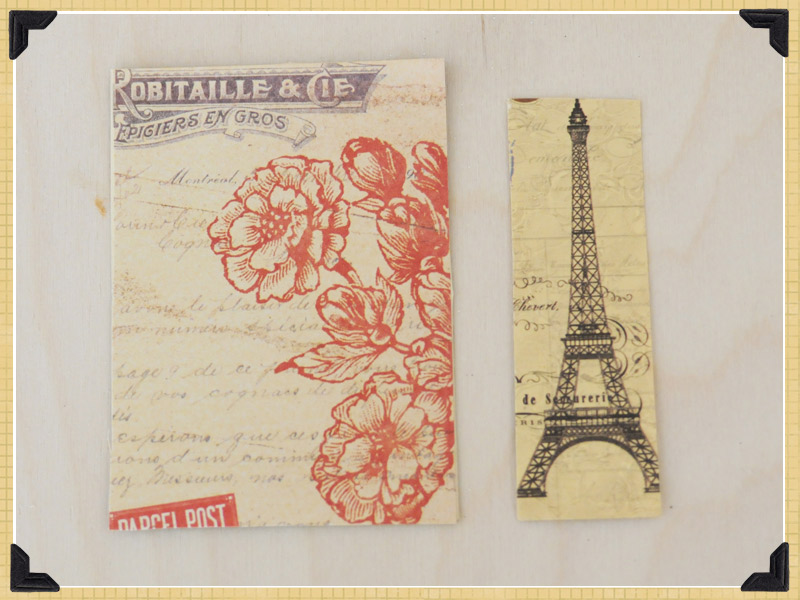
1. Cut 7 Gypsies Lille Patterned paper to size and glue to ATC sized card. Ink Eiffel Tower Tag if desired, and then cut tag with Eiffel Tower image as shown and glue to left side of card.
2. Brush the edges of the card lightly with a brush dipped in warm white paint (use the paint sparingly with a dry brush to get a lightly painted edge). Let dry.
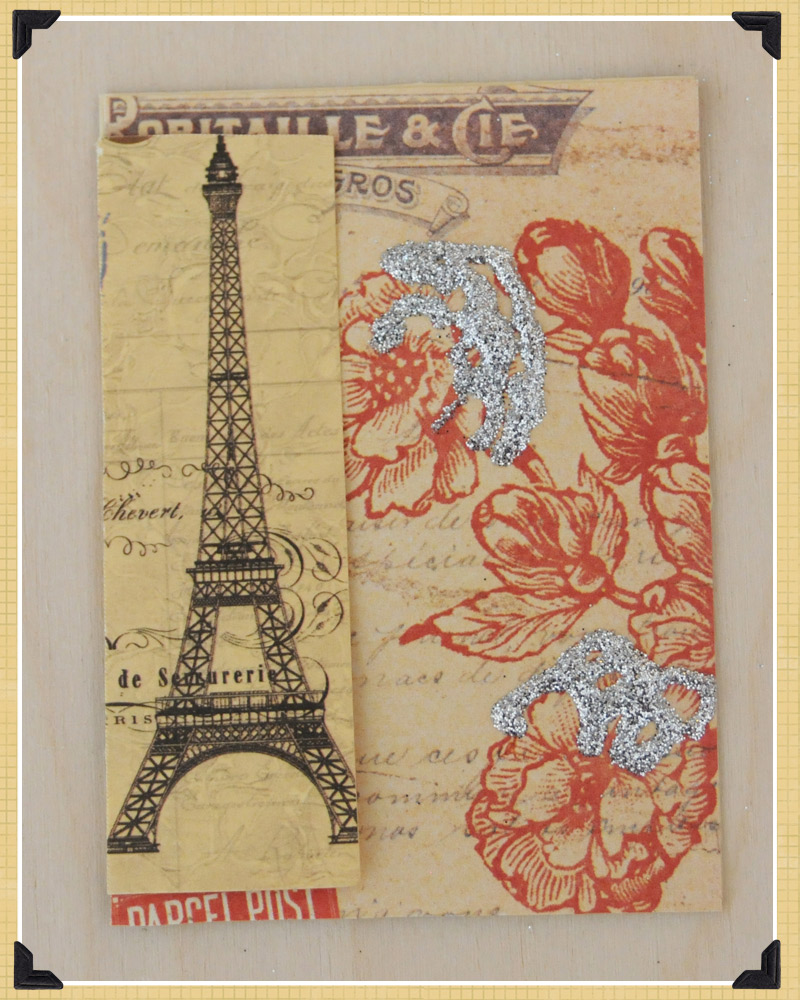
3. Use a fine tipped glue pen to outline a portion of the flowers on the patterned paper and sprinkle with silver glitter, shake off excess and allow to dry.
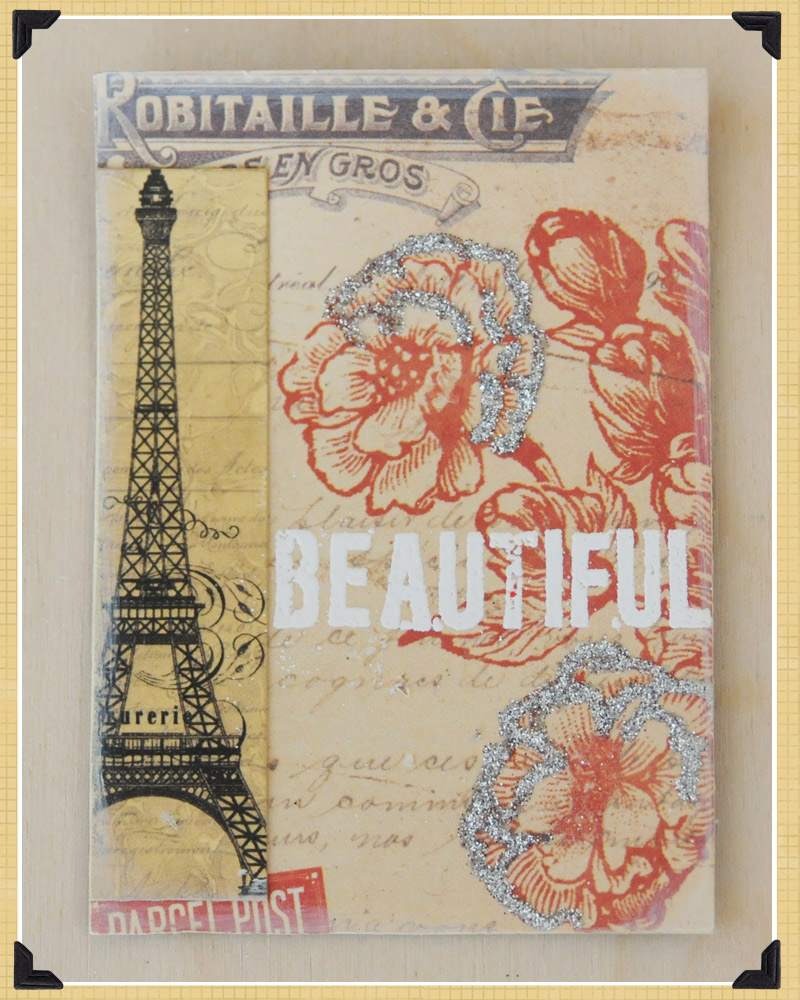
4. Stamp card with “Beautiful” Stamp (I used Papertrey Ink Perfect Match Hybrid Ink in Fresh Snow). Apply white embossing powder, shake off excess and heat set with heat gun.

5. Brush number 9 tag with white paint on edges, allow to dry and then raise with pop dot, applying to card as shown.
6. Paint metal wing white and allow to dry, then apply white pigment ink to front of wing, apply white embossing powder and shake off excess, heat set with gun.
Tip: be careful not to burn fingers as the metal will get hot as you heat it.

7. Cover clip with glue and tissue paper.
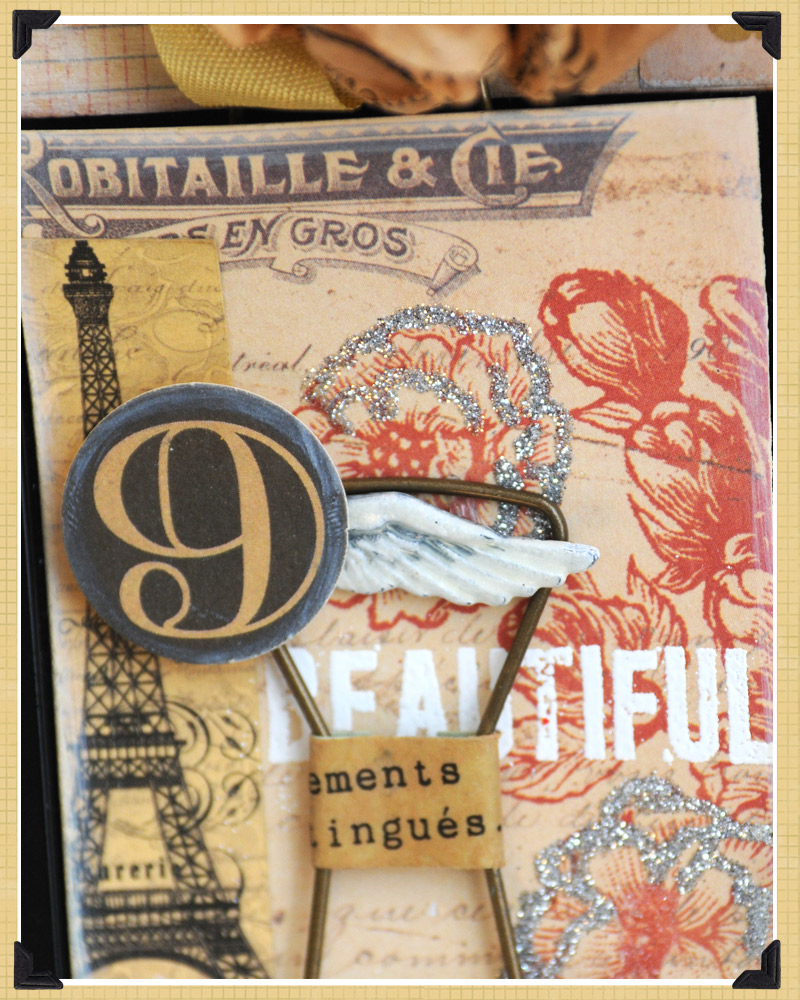
8. Adhere wing as shown and add ribbon to the bottom of the clip area if you like.
A little about me… I have been crafting or creating things for as long as I can remember. I love flea marketing and antiquing. I lenjoy spending a Sunday afternoon at a bookstore or at home by the fire curled up with a cup of tea. I love celebrating holidays, looking for inspiration in the world around me and enjoying creative journeys. I want to travel the world, and am a gypsy at heart! You can see more of my work at http://www.scrapologie.blogs.com
A blog that I love reading right now is Paris Breakfasts, http://parisbreakfasts.blogspot.com for Carol Gillott’s gorgeous watercolor renderings, especially of macarons! and her musings on her travels.
Join Ann Mabee Saturday for section #10. Other items you will need are:
Large and small scalloped oval punch (Fiskars) (or scissors)
small heart punch (Fiskars) (or scissors)
dictionary page (from an old, discarded dictionary)
glitter and glue
distress ink and blending tool
chipboard circle (or packaging)
needle and thread


'artist advent blog kit: section #9 by ranjini malhotra' has no comments
Be the first to comment this post!